Configuring Ionic 2 Web Applications
Although there's a lot of talk about Ionic 2 being suitable for creating progressive web applications (PWA), there's little guidance on how to actually configure a project to achieve this. In this post I am listing everything I changed in my project, to build a mobile web application (not yet progressive).
Building for Browser Platform
Ionic 2 build targets are tied to Cordova platforms. In order to build a pure web application without packaging for a specific mobile platform, you need to target the browser platform. A newly generated Ionic 2 project doesn't have any platforms preinstalled, therefore you first need to add the browser platform to it:
cordova platform add browser --save
The --save switch will ensure that the platform is saved to config.xml so that it can be be easily restored after checking out the project from source control:
cordova prepare
Platform management in Ionic 2 is a bit confusing at the moment because Ionic CLI also has its own equivalent commands, but saves the added platforms to package.json. I decided in favor of Cordova CLI based on Ionic team plans to deprecate this functionality in Ionic CLI.
Once the platform is added, you can invoke the build just like for any other platform:
ionic build browser
The generated site should be packaged in platforms/browser/build/package.zip, but due to a bug in the zipping process, the file is invalid. Until the bug gets fixed, you'll need to grab the files from platforms/browser/www subfolder of your project. To immediately run the generated site in a local HTTP server and open it in Chrome, invoke run command instead:
ionic run browser
You'll need to pay special attention to all Cordova plugins when targeting the browser platform. Many plugins don't support it or only have a mock implementation for it. I didn't have a lot of issues with those that are installed in the project by default. I only decided to disable the splash screen because it didn't make sense to me in a web application. I only needed to add the following to config.xml:
<platform name="browser">
  <preference name="ShowSplashScreen" value="false" />
</platform>
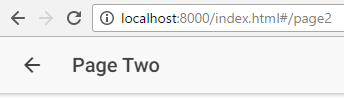
URL Based Access to Individual Pages
By default, Ionic 2 applications are single page applications with a single fixed URL. This gives the application only a single entry point - its root page. To access any page directly, you will need to provide each page with a unique URL by configuring DeepLinker accordingly:
let deepLinkConfig: DeepLinkConfig = {
  links: [
    { component: Page1, name: 'Page 1', segment: 'page1' },
    { component: Page2, name: 'Page 2', segment: 'page2/:item' }
  ]
}

@NgModule({
  imports: [
    IonicModule.forRoot(MyApp, {}, deepLinkConfig)
  ],
  // other declarations
})
The above configuration could be used for the sidemenu starter template. The key part is the matching between the pages (component property) and their relative URL (segment property). The name property is required, but I haven't figured out yet, where it is used.
Notice the :item part for Page2: each segment starting with : matches the navigation parameter with the same name (item in this case). It doesn't really work for this starter because the parameter must be a simple value and item is an object. To make it work, item.title would need to be passed instead of item.
I also found the configuration to be a bit tricky for tabs, mostly due to the way tab navigation works in Ionic 2. There are two things to pay attention to:
- DeepLinker configuration must include all tab pages, as well as the root page hosting the tabs.
- All
ion-tabcomponents inside the sameion-tabscomponent require uniquetabUrlPathvalues. If they are not specified,tabTitlewill be used instead, but you really don't want that, especially in a localized application.
Here's a working configuration for the tabs starter template:
let deepLinkConfig: DeepLinkConfig = {
  links: [
    { component: TabsPage, segment: 'tabs', name: 'Tabs' },
    { component: AboutPage, segment: 'about', name: 'About' },
    { component: HomePage, segment: 'home', name: 'Home' },
    { component: ContactPage, segment: 'contact', name: 'Contact' },
  ]
}
And here's the modified tabs.html file:
<ion-tabs>
  <ion-tab [root]="tab1Root" tabUrlPath="home-tab"
           tabTitle="Home" tabIcon="home"></ion-tab>
  <ion-tab [root]="tab2Root" tabUrlPath="about-tab"
           tabTitle="About" tabIcon="information-circle"></ion-tab>
  <ion-tab [root]="tab3Root" tabUrlPath="contact-tab"
           tabTitle="Contact" tabIcon="contacts"></ion-tab>
</ion-tabs>
The generated URLs will still be longer than you might want them to be (e.g. tabs/home-tab/home for HomePage), but there's no way to change that in Ionic 2 at the moment.
Hiding the Back Button in Navigation Toolbar
Since browsers have their own back button, I don't think the application needs to show its own back button in the navigation toolbar when running in a browser.
If you're only developing the application for web, you can completely hide the back button by setting an attribute on ion-navbar component:
<ion-navbar hideBackButton="true">
To keep pages more consistent, I replaced the missing back button on child pages with side menu button (persistent attribute will force the button to be shown on child pages):
<ion-menu [content]="content" persistent="true">
If you also want to build your application for the mobile platforms, you should rather hide the back button based on the target platform. My first bet was checking the platform:
let inBrowser = !platform.is('cordova');
Unfortunately, there doesn't seem to be a way to differentiate between the web app running in an Android browser and the mobile app running on Android. The set of platforms is the same in both cases. In the end, I resorted to checking the URL:
let inBrowser = platform.url().startsWith('http');
Since I didn't want to repeat the code and markup on every page with navigation toolbar, I wrapped everything in a simple component:
@Component({
  selector: 'my-navbar',
  templateUrl: 'my-navbar.html',
  inputs: [
    'title'
  ]
})
export class MyNavbarComponent {

  title: string;
  inBrowser: boolean;

  constructor(platform: Platform) {
    this.inBrowser = platform.url().startsWith('http');
  }
}
This is its template:
<ion-navbar [hideBackButton]="inBrowser">
  <button ion-button menuToggle>
    <ion-icon name="menu"></ion-icon>
  </button>
  <ion-title>{{title}}</ion-title>
</ion-navbar>
Now, I can only add this component to each page and set the title accordingly:
<ion-header>
    <my-navbar title="Page One"></my-navbar>
</ion-header>
