Changing Network Location to Private in Windows 8.1
Windows 8.1 doesn't seem to always ask for location (public or private) when connecting to a new network for the first time, instead it often defaults to public. While this certainly is more secure than the opposite option, it can cause difficulties when trying to take advantage of features that are by default disabled on private networks, such as network discovery and remote access. Since enabling them for public networks would be insecure, the only option to use them on such a network is to change the location to private as it should be.
The simplest way to do it in Windows 8 is by following these steps:
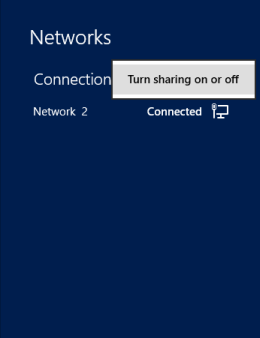
- Right click the network icon in taskbar to open the Networks pane.
- Right click the network in question to open the context menu.
- Click the Turn sharing on or off option to invoke the network location selection.
- Choose the second option to change the network location to private.

Unfortunately this doesn't work in Windows 8.1 because there's no context menu available for the connections in Networks pane any more. It seems that the only way to reach this dialog again, is to delete the associated wireless network profile. There's no user interface to do that either but fortunately it can be done by calling netsh from command line:
netsh wlan delete profile name="HomeWiFi"
If you don't know the name of the profile you can list all that are stored with the following command:
netsh wlan show profiles
While you're at it delete all of the profiles in the list that you don't use regularly. This will make it much less likely that your computer will automatically connect to a random access point with a matching SSID.
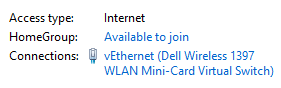
After reconnecting to the same network this always caused the network location dialog to reappear for me until I tried it on my laptop I'm using for presentations. To my surprise the dialog still didn't show up and the network remained public. After looking for a possible cause I noticed both connections (wireless and wired) on the network were actually virtual switches, because Hyper-V was installed recently.
This finally set me on the right track for fixing the issue – I needed to temporarily unbind the switch from the network connection to change its location and then bind it back following these steps:
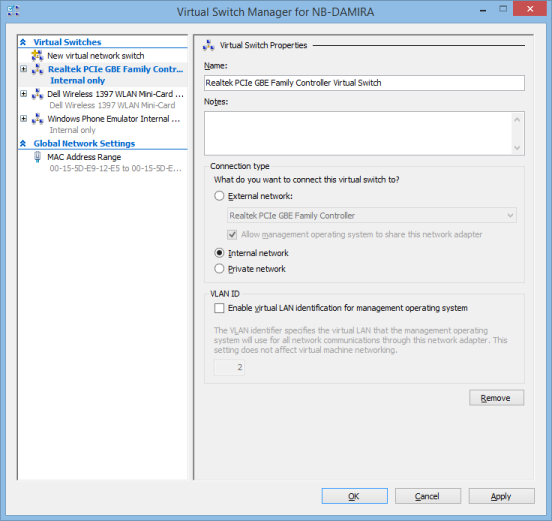
- In Hyper-V Manager click the Virtual Switch Manager... action in the right hand side pane to open the Virtual Switch Manager dialog.
- In the Virtual Switches list on the left select the one bound to the connection you want to change the location for.
- Change the connection type to Internal network and click OK.
- If you have multiple connections for the same network do this for all virtual switches bound to them.
- Delete the wireless profile as described above, reconnect to the network and set the network location to private once the dialog pops up.
- Once you confirm that the network location is set to private by refreshing the Network and Sharing Center dialog change the virtual switches back to their original connection type: External network. If you have more than one of them, make sure you select the right external network for each virtual switch.
I'm pretty sure I'll be referring back to this text some time in the future when I encounter the same problem again. Until then I hope someone else is going to find it useful as well.
