Lifeline-like Notifications in UWP
When Lifeline was originally released in 2015 for iOS, it became the number one paid app in the App Store. Although, in essence it was just a text based adventure, it took full advantage of interactive notifications introduced in iOS 8, creating an illusion of real-time communication with the stranded astronaut Taylor. The approach even earned it IMGA award nominations for excellence in innovation and excellence in storytelling.
Today, the game has 2 sequels already, with all three games being available for iOS and Android. None of the games has been ported to Windows Phone yet. While Windows Phone 8 and 8.1 had no support for custom toast interactions, making the experience impossible to recreate, notifications in Windows 10 are on par with iOS and Android.
In Windows 10 universal applications are not limited to a selection of predefined templates any more. Instead, they can be designed using a specialized XML markup language. A great tool for working with it is Notifications Visualizer, a simple editor with a live preview which also includes multiple predefined templates.
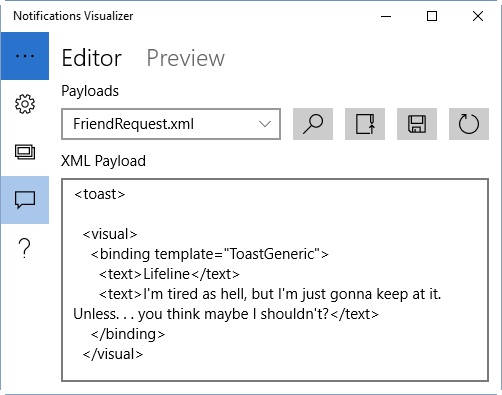
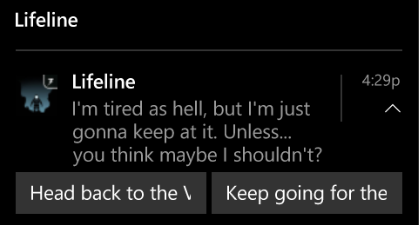
The following XML could be used to create a typical notification from Lifeline:
<toast>
<visual>
<binding template="ToastGeneric">
<text>Lifeline</text>
<text>I'm tired as hell, but I'm just gonna keep at it. Unless. . . you think maybe I shouldn't?</text>
</binding>
</visual>
<actions>
<action content="Head back to the Varia." activationType="background"
arguments="option=1&interactionId=42"/>
<action content="Keep going for the peak." activationType="background"
arguments="option=2&interactionId=42"/>
</actions>
</toast>
To show the notification, the XML should be loaded into a XmlDocument:
string xmlText = "..."; // XML tile definition
var xmlDoc = new XmlDocument();
xmlDoc.LoadXml(xmlText);
var toast = new ToastNotification(xml);
ToastNotificationManager.CreateToastNotifier().Show(toast);
Instead of modifying the resulting XmlDocument directly to fill it in with correct texts and arguments, a strongly typed object model can be used. Just install the NotificationsExtensions.Win10 NuGet package. The above XML can now be replaced with C# code:
ToastContent content = new ToastContent()
{
    Launch = "messageId=42",
    Visual = new ToastVisual()
    {
        TitleText = new ToastText()
        {
            Text = "Lifeline"
        },
        BodyTextLine1 = new ToastText()
        {
            Text = "I'm tired as hell, but I'm just gonna keep at it. Unless... you think maybe I shouldn't?"
        },
    },
    Actions = new ToastActionsCustom()
    {
        Buttons =
        {
            new ToastButton("Head back to the Varia.", "option=1&messageId=42")
            {
                ActivationType = ToastActivationType.Background
            },
            new ToastButton("Keep going for the peak.", "option=2&messageId=42")
            {
                ActivationType = ToastActivationType.Background
            }
        }
    }
};
var xmlDoc = content.GetXml();
This way, replacing the hardcoded texts becomes much easier.
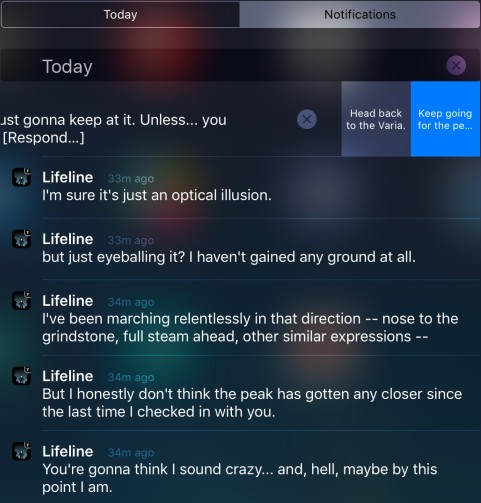
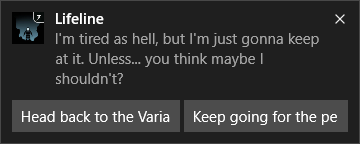
When a toast pops up, the user can read the text and select one of the available actions directly inside the toast, without even starting the application.
If she misses it, it waits for her in the notification center, where the action can be again directly triggered:

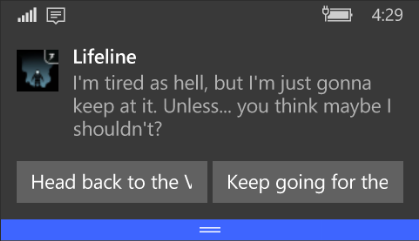
The same code works on the phone, but the notifications are rendered differently:
Since the application will usually not run when notifications pop up, the actions need to be processed in a background task (hence ToastActivationType.Background in the toast definition):
public sealed class NotificationActionBackgroundTask : IBackgroundTask
{
    public void Run(IBackgroundTaskInstance taskInstance)
    {
        var details = taskInstance.TriggerDetails
            as ToastNotificationActionTriggerDetail;

        if (details != null)
        {
            string arguments = details.Argument;

            // process the action
        }
    }
}
As always, the background task needs to be put into a separate Windows Runtime Component project. The application needs to reference it and declare a system event background task in the manifest:
<Extensions>
  <Extension Category="windows.backgroundTasks"
             EntryPoint="LifelineTasks.NotificationActionBackgroundTask">
    <BackgroundTasks>
      <Task Type="systemEvent" />
    </BackgroundTasks>
  </Extension>
</Extensions>
As the last step, the background task needs to be registered with a ToastNotificationActionTrigger set:
BackgroundTaskBuilder builder = new BackgroundTaskBuilder()
{
    Name = "ToastTask",
    TaskEntryPoint = "LifelineTasks.NotificationActionBackgroundTask"
};

builder.SetTrigger(new ToastNotificationActionTrigger());

BackgroundTaskRegistration registration = builder.Register();
As an added bonus, our toast definition includes launch arguments:
Launch = "messageId=42"
Because of it, when the user just clicks on the toast without selecting an action, the application will launch with this argument (or activate if its already running). The argument can be processed in the App.OnActivated method toset the focus to the correct message in the history.
