Using Git in Session Demos
I often find myself speaking at technical conferences and user group meetings and due to the nature of my sessions, there are usually demos involved. A particular kind of demos I often struggled with to make them work well within a session, are the ones in multiple steps, i.e. they show the same project or solution in different stages of development. There are two basic approaches to such a scenario:
- You modify all the code during the session (a.k.a. live coding). For this to work well, the code shouldn't change too much between the steps and you need to be really well prepared not to make (too many) mistakes, otherwise the audience can quickly loose interest and become bored. The coding process can be accelerated by inserting custom snippets or copying premade code, but this can backfire if it gets too difficult to follow.
- You already have the code prepared for each step you want to show. Now you only need to open the right solution for the step and explain all the relevant changes. The downside to this approach is the time consuming and distracting closing and opening of solutions in Visual Studio.
Recently I started using Git to streamline the second approach. The main idea is to have each step committed in Git as a separate conveniently named branch. Switching to the right code for each step now involves only a checkout of the corresponding branch. Using the right client this can be done quickly without distracting the audience:
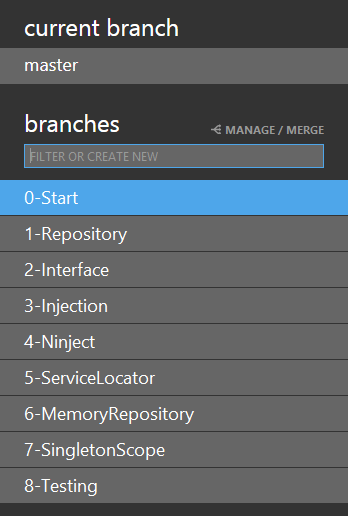
- To checkout a branch in GitHub for Windows you only need to click on the current branch name at the top of the repository page and select a different one from the dropdown. Visual Studio automatically detects changes in the opened solution and suggests a reload as soon as it gets back the focus. After that the code is ready to be shown to the audience and only needs to be rebuilt before it is run.
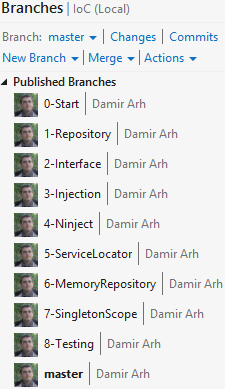
- After installing Visual Studio Tools for Git extension you can also checkout a branch directly from Visual Studio. All of the branches are listed on the Branches page of Team Explorer tool window. To checkout a different one you only need to double click it in the list. Not even a reload of the solution is required; Visual Studio quietly handles all the changes in the background and makes the right set of files available.
There are a couple of other advantages to this approach:
You automatically get a local source control repository for your sample giving you full versioning support during development, effectively avoiding the risk of making a change to the code which you'll later regret.
If you need to add something to multiple steps you can easily merge / cherrypick the change to all affected branches. You don't need to manually apply the same change to multiple solutions at the risk of making them inconsistent.
You can easily make the repository publicly available for the audience by pushing it to any free online Git repository hosting service. Personally I prefer BitBucket because they also offer unlimited private repositories for free which I can make public after the session. GitHub, CodePlex and other services will work just as well.
The same workflow could probably be achieved using any other distributed version control system (DVCS) instead of Git. You only need to have the complete repository available locally so that you can change between branches without contacting the server. A client which makes you do that easily and without distractions is a welcome bonus.
